What is sweet is the upcoming merry-making during the holidays and other celebrations. And what is loveable is showcasing your family and/or friends via the following 5 holiday/celebration creations involving your photos.
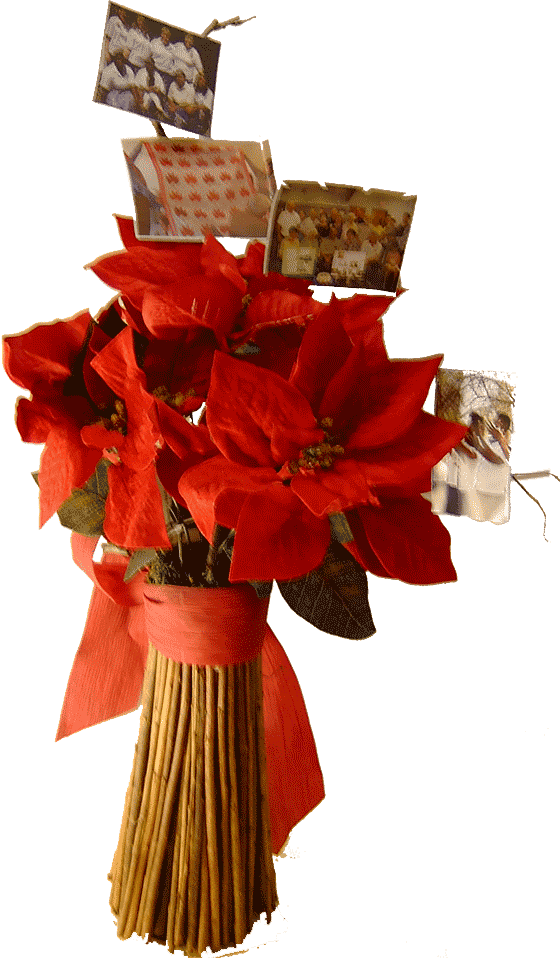
1. Create a Family/Friend Photo Poinsettia Centrepiece
The Family/Friend Photo Poinsettia Centrepiece is a picture-perfect decoration in your home for the holidays or other celebrations. Poinsettia provides great colour and amazing aura of celebration for photos of your loved ones such as family members, relatives and friends.
Materials:
- Poinsettia in pot
- thin, tree branches from your yard, roof-top garden or nearby public park
- decorative ribbons 3/16 in. (0.47 cm)
- small photos
- small cellulose sponges (antibacterial sponges are easier to work with because they are much softer than regular sponges, if they are used immediately after opening the package)
- scissors
- tape (broad type)
Steps
- Insert branches into the earth in the Poinsettia pot.
- Cut the sponge into rectangular pieces whereby the width is about 1/2 inch (2.5 cm) and the length is such that it will cover the back of each photo from the left side to the right side.
- Tape the sponge to each center of the back side of each photo.
- Attach photos to the branches by taping the sponges to the branches.
Use your fabulous pièce de résistance as a centrepiece, or to decorate around your home for the holidays or other celebrations. Also, your creation can be a heartfelt gift for a senior friend in a nursing home.
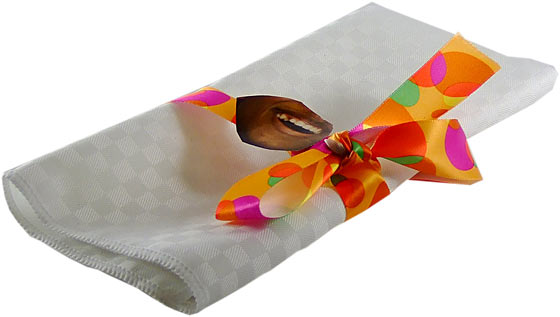
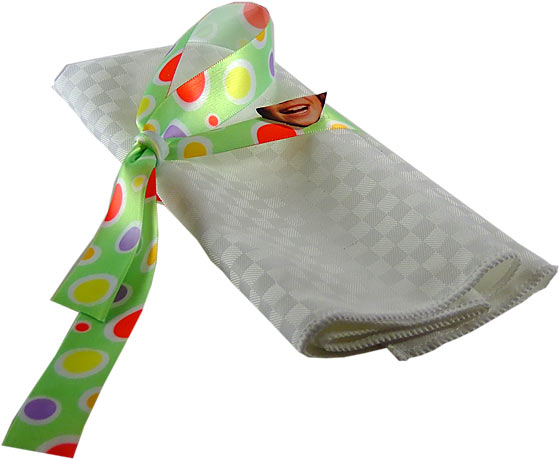
2. Smiling Party Napkins
Spread the love around by showcasing the smiles of your family members and friends on party napkins!
 Materials
- cloth napkins
- decorative polyester ribbons 7/8 in.(22mm) wide of different colours
- photos
- tape
Steps
- Take close-up pictures of the smiles of your family, relatives and friends. Make sure they smile before snapping pictures!
- Cut out the smile from each person’s photo.
- Tape each smile to a ribbon.
- Decorate each napkin by tying the smile ribbon around it.
- Tell everyone to locate his/her seat at the table by choosing the party napkin with the smile that belongs to him/her.
Fantastic fun for all! You’ll enjoy seeing the guests giggling over these sensational smiling napkins!
3. Photo Cookies for Kids
Treat the kids to cookies and photo fun!
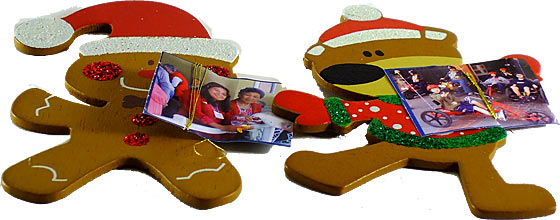
Materials
- gingerbread men and gingerbread bears
- gold thread
- photos
Steps
- Take close-up photos of the kids.
- Attach each photo to a thread.
- Tie thread to the arms of a gingerbread man or gingerbread bear.
Oh what fun the kids will have eating cookies as they look at their pictures!
4. Create Family/Friend Photo Globes
Show your loved ones that you think the world of them by making Family/Friends Photo Globes.
Materials
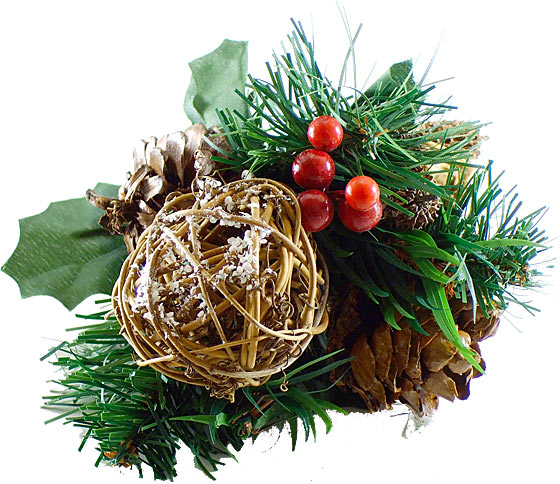
- 3 six-inch diameter vine topiary balls or, for variation, 3 topiary balls of different diameters
- 3-D rosebud garland on cream-coloured ribbon 4/16 in. (3 mm) wide
- decorative, satin ribbon with salutation “WITH LOVE”
Steps
- Go to http://www.nationsonline.org/oneworld/continents_map.htm
- Print out the full size image of the world.
- Cut out the continents and tape them to the topiary ball to make the topiary ball look like a world globe.
- Tape photos of loved ones onto the areas that surround the continents. You may choose one topiary ball for family photos, and another one for relatives’ photos and a third one for friends’ photos.
There are 4 ways to showcase your loved ones and let them know that you think the world of them:
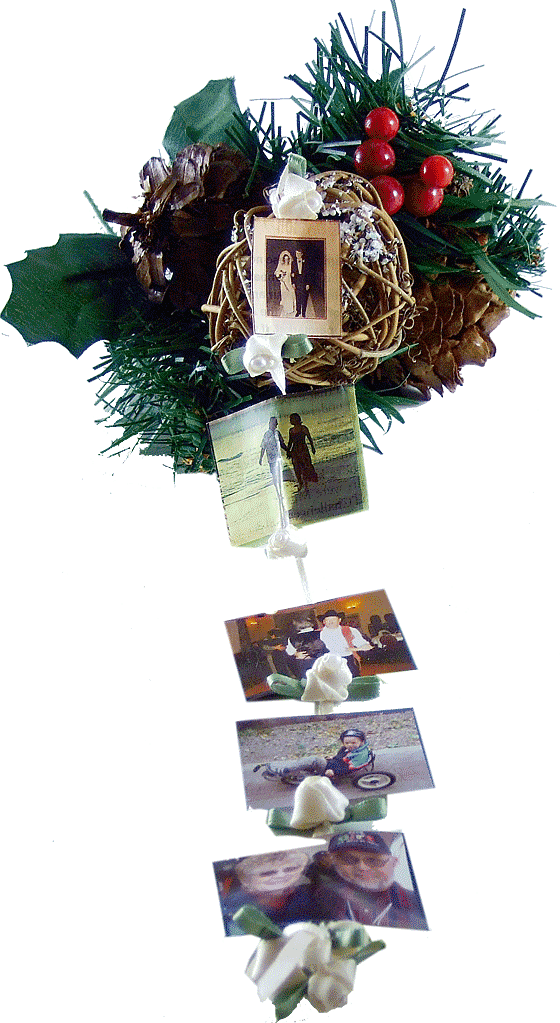
- Attach a pole stem and place the finished creation in a flower pot for an elegant display.
- Fill a large bowl with photo globes for an interesting table display.
- Three photo globes tied together by thin wired ribbon with the salutation “WITH LOVE” would make an awesome addition to a table or shelf.
- When attached to three different lengths of ribbon (cream ribbon with the 3-D rosebud garland), the photo globes can be hung from a window, archway door or centre of a curtain rod for a dynamic decorative touch. When draped with luxurious fabric, the view of the photo globes within is fabulously framed!
5. Create JOY in Your Home
What a wonderful way to say how much your family/friends mean to you!
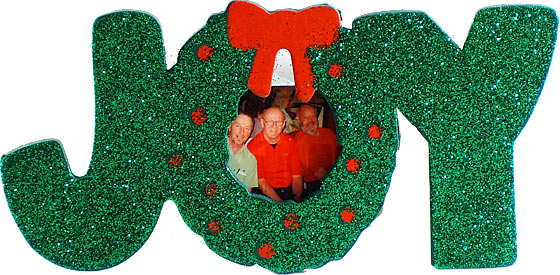
Materials
- sticky back foam sheets – glitter/multi-coloured type; easy to cut; peel and stick; dimensions:0.08 in x 6 in x 9 in (2mm x 15.24 cm x 22.86 cm)
- scissors
- ribbon 7/8 in. (22 mm)
- miniature photos: 1 3/4 in x 1 1/4 in (40 mm x 38 mm)
Steps
- On the back side of one foam sheet, trace out the word “JOY”. Make sure that all the letters are connected to each other at the sides so that when you cut out the word “JOY”, the word comes out as one piece of glittered, coloured foam.
- Cut out the inner circle of the letter “O” so that the letter “O” in the word JOY looks like a doughnut.
- Peel off the back cover of the letter to expose the adhesive.
- Stick the photo of your loved ones onto the sticky back side of the letter “O” so that you can see the face(s) when you read the word “JOY”.
- Peel off the remaining back cover of the other letters “J” and “Y” and stick the word “JOY” to a ribbon.
- Hang it anywhere
Voilà, you have just created a joyful showcase of your family/friends in your home for the holidays or other celebrations!
Please let us know what you think. Were all the above Sweet & Loveable for you?